
How I made my sprinkler controller for my garden and yard. The controller provides http endpoints that trigger a sprinkler valve to turn on or off. A daily routine can be provided using cron, and/or a frontend could be built to turn the sprinklers on and check their state (neither of those tasks is covered here).
Needed Materials:

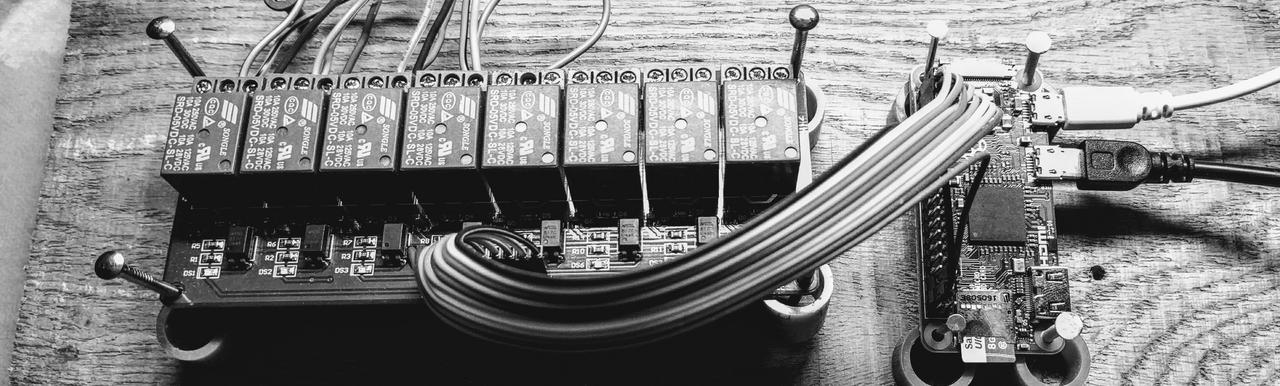
- (1) 8-channel Relay
- (1) Raspberry Pi Zero + ethernet/wifi + power supply
- (1) 12v DC Power Supply for sprinklers. 500mA - 1A should be fine.
- Sprinkler Wiring
- (8) Sprinkler Valves
- Jumper wires
- Some PVC, elbows, PVC glue, thread tape, thread paste
- Source code https://github.com/atmartins/martins-sprinklers
Note on the wire: I used a 5-wire, so I can run 4 zones (we have 8 relays, 4 unused for future), and have one wire left-over for ground.
Build the manifold
Things to consider
- Space the valves far enough apart that they can be rotated for installation and removal.
- You'll need n+1 wires, where n is the number of valves you have. The +1 is for common ground.
- I recommend using thread-tape and paste on threaded joints. Water + electricity is no-good.
- (Colder regions) Use threaded connections for anywhere that the manifold attaches to permanent structure (main line in, and each zone out). In the fall, you probably want to turn the water off and completely remove the manifold, keeping it indoors to prevent freeze issues.
I used 3/4" PVC and glued several parts. Only 3 valves are connected in the picture, the 4th will be for a hose to give my dogs fresh water at regular intervals.
Software Installation

Install Node on Raspberry Pi. These commands worked for me:
wget http://node-arm.herokuapp.com/node_latest_armhf.debsudo dpkg -i node_latest_armhf.deb
This will give you the latest copy of Node created for ARM architecture, which is not exactly bleeding edge (I got Node v4.2.1 in April 2017), but that's okay!
Clone this repo and upload it to your pi.
git clone [email protected]:atmartins/martins-sprinklers.git
Modify deploy.sh (adjust IP address of your Pi, or anything else needed).
cd martins-sprinklers && vim deploy.sh
Then run deploy to copy the source to your Raspberry Pi
./deploy.sh
SSH into the Pi and start the sprinkler server:
ssh [email protected]node /home/pi/martins-sprinklers/index.js
Use - Turning Water On/Off

There are a few endpoints that can be interacted with. I'm running this on my Raspberry Pi on my local network at 192.168.1.217:3217.
If you use a tool like Postman, you can very easily hit these endpoints.
HTTP Verb - URL - Explanation
PUT-http://192.168.1.217:3217/channel/all/on
Turn all channels on.PUT-http://192.168.1.217:3217/channel/all/off
Turn all channels off.
The following work the same for channels 1-8:
PUT-http://192.168.1.217:3217/channel/1/on
Turn channel 1 on.PUT-http://192.168.1.217:3217/channel/1/off
Turn channel 1 off. etc